Translation: Step 2 - Install Messages Editor
The messages editor provides several features which makes the translation of the text files much easier than using the built-in editor.
A custom version of the original babel resource editor will be installed which has these modifications:
- Bugfix for a NPE because it was always thrown
- Much better performance for larger files (it can take 10s of seconds in the original verison to modify one text string)
- Wided the width of the editor splitter to make the keys more visible
Content
Installation
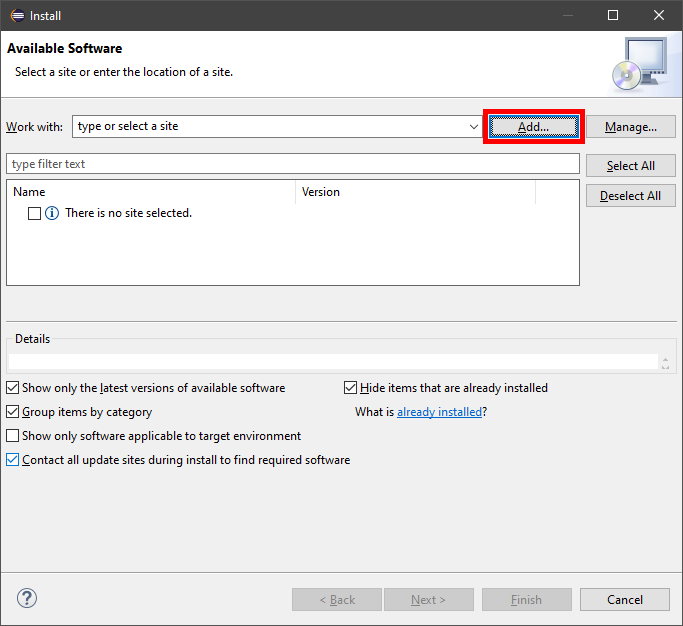
- Open install dialog from the menu with Help/Install New Software...
-
Press Add... button
- Set Name to Babel Resource Editor
- Set Location to https://mytourbook.sourceforge.io/update-site-babel-editor
-
Press OK button
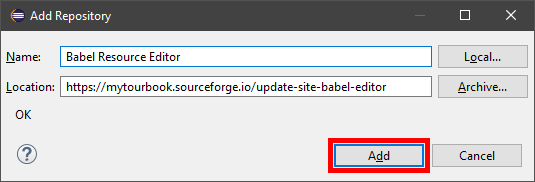
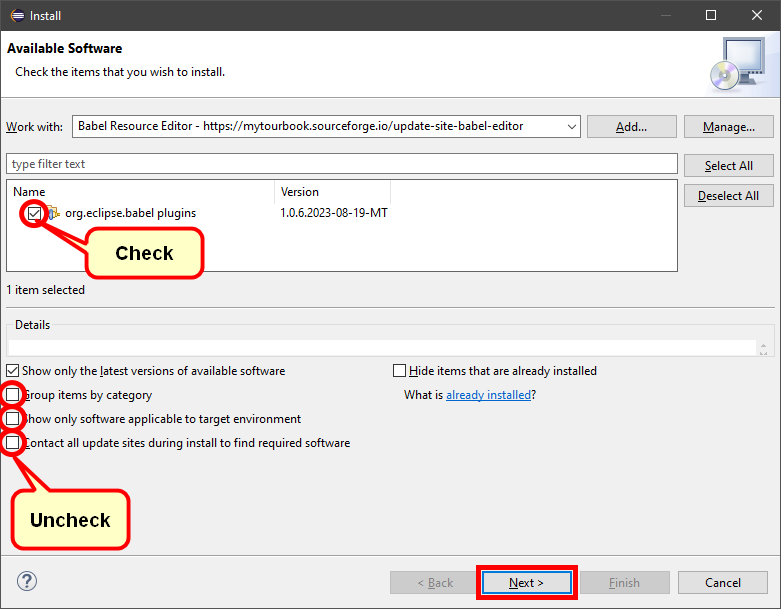
- Uncheck Contact all update sites during install to find required software because this can be very slow
- Uncheck Group items by category to see the babel plugin
- Check org.eclipse.babel plugins
-
Press Next button
-
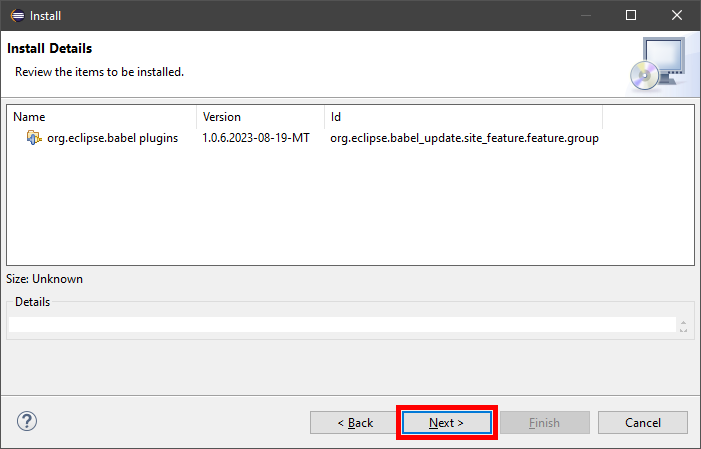
Press Next button
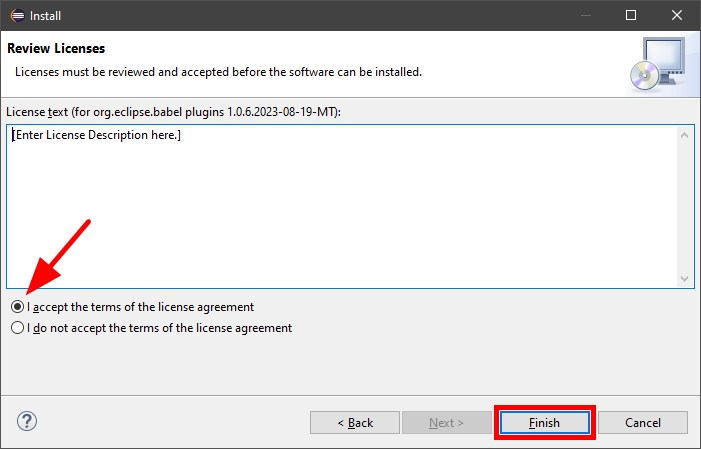
- Accecpt license agreements
-
Press Finish button
-
Wait until the plugin is downloaded
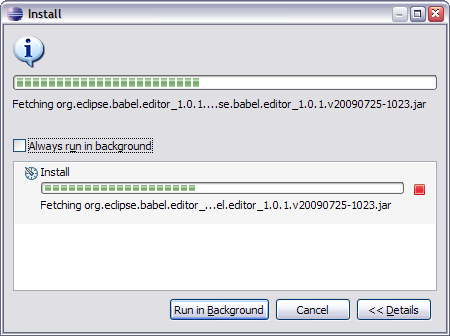
-
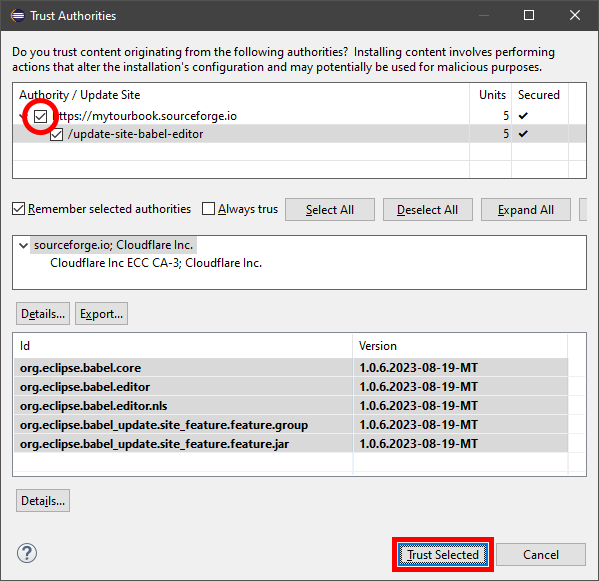
Check Authority and press Trust Selected to continue the installation
-
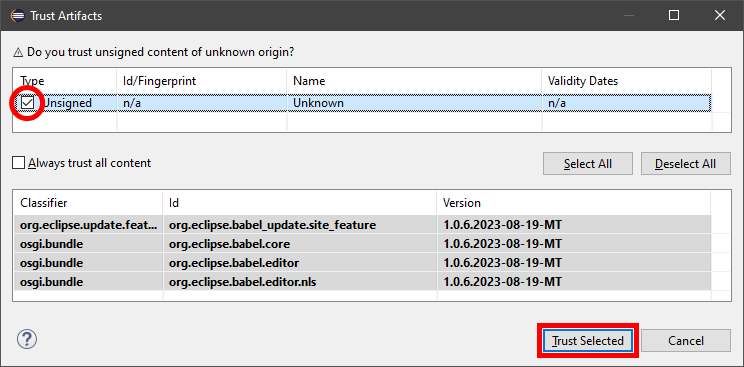
Check Unsigned and press Trust Selected to continue the installation
-
Press Restart Now button to restart Eclipse

Configuration
After restarting Eclipse, the Messages Editor should be available in the preference dialog.
There are a few settings which needs to be adjusted:
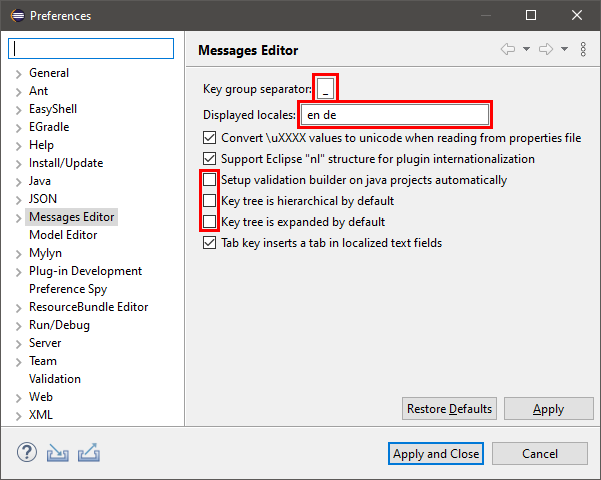
- Open preference dialog from the menu with Window/Preferences
- Select Messages Editor
- Set Key group separator to _ (underscore)
- Set Displayed locales see below
-
Set other fields which are marked with a red box
Displayed Locales
The locales define which languages are displayed in the Messages Editor.
Available locales which MyTourbook currently supports:
- cs - Czech
- de - German
- en - English
- es - Spanish
- fr - French
- it - Italian
- nl - Dutch
The english locale contains all available text and should be set into this field. The language which should be translated should be added as second locale,
e.g.: en, de or en, fr or en, nl
Formatting
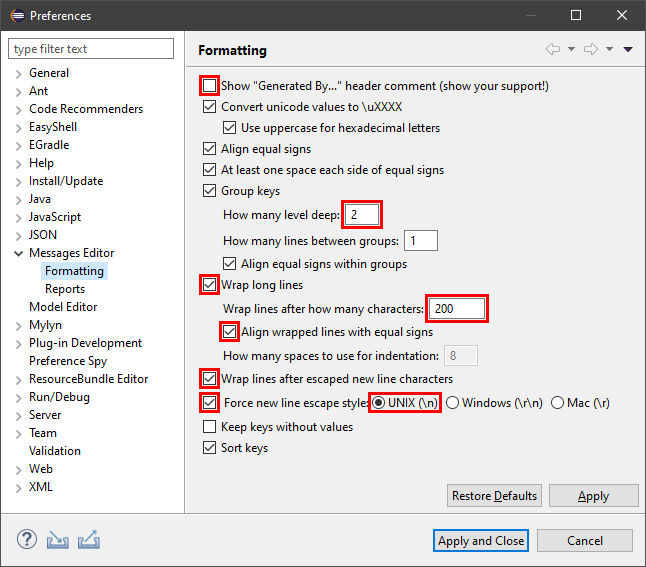
- Select Formatting
-
Set all fields which are marked with a red box
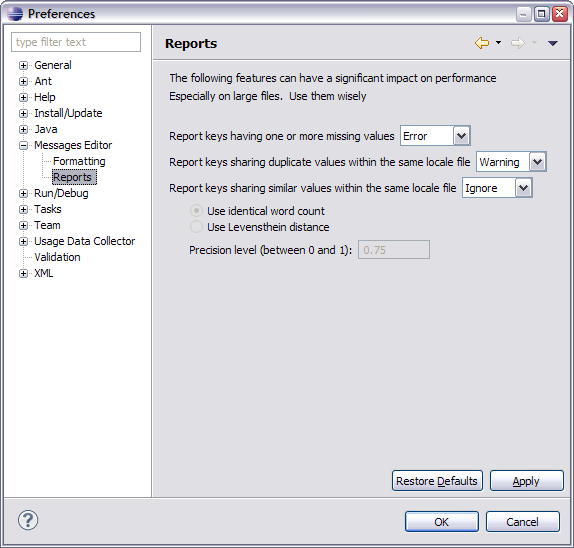
- Reports do not have any modifications but you can define which errors or warnings should be displayed for missing or duplicated text
-
Press OK
This page is updated for version 23.8


