Translation: Step 4 - Translate Text
This step describes how to translate the text and how to create missing language files.
Text files in the Package Explorer
The package explorer shows only text files, all other files which are necessary to create the whole application, are not included in the translation projects.
A project always contains text files for all languages even when they are not translated by you.
To have a real world example, this page describes how to translate the text into french language. To do this, the locales must be set in the preference dialog to en,fr,all french text filenames will end with *_fr.properties. The english text files have no additional language postfix.
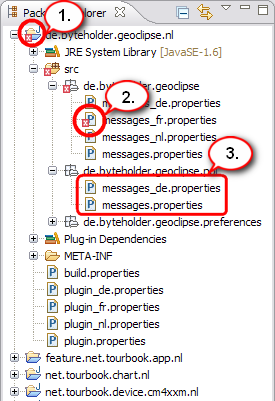
When the locales are set correctly, the package explorer shows the following informations:
- the red ellipse shows that there are languages files in the project de.byteholder.geoclipse.nl which needs to be translated
- the red ellipse shows that some text in the file messages_fr.properties needs to be translated
- the file messages.properties do not have the translation file messages_fr.properties because it should be located in the same folder, the file needs to be create which is described here

English and the translatated text files
Open text file
With doubleclick in the Package Explorer a text file can be opened in the Messages Editor.
Messages Editor
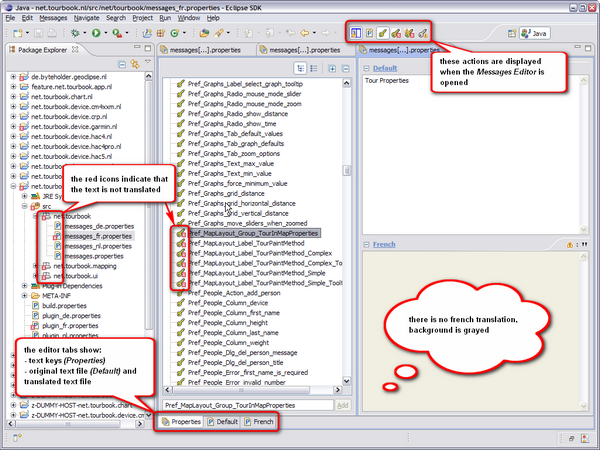
This screenshot shows the Messages Editor and describes it's features.
Editor Actions
|
Show/hide text key tree |
|
|
|
Add new locale, this is currently not working, use instead File/New/Other.../Messages Editor/ResourceBundle |
|
|
Show all text keys |
|
|
Show text keys with missing translation |
Spellchecking
Spellchecking is enabled by default and shows an underlined word in the editor text file when the word is not available in the dictionary. Spellchecking can be disabled in the preference dialog at the prefernece page General/Editors/Text Editors/Spelling by unchecking the option Enable spell checking.
Create Language File
When a translation file is not available it can be created with the Resource Bundle Wizard.
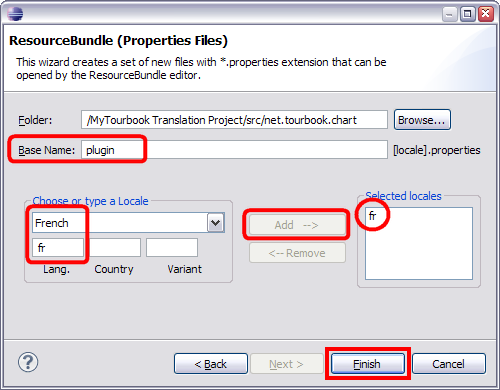
- select in the menu File/New/Other.../Messages Editor/ResourceBundle
- in the field Base Name enter the file name (without extension) which should be translated, this is mostly the file name: messages or plugin
- select language in the Locale list
- press Add --> button to set the field Selected locales
- press Finish button, this creates an empty file for the selected language and the file is opened in the Messages Editor

Resource Bundle Wizard
Problems View
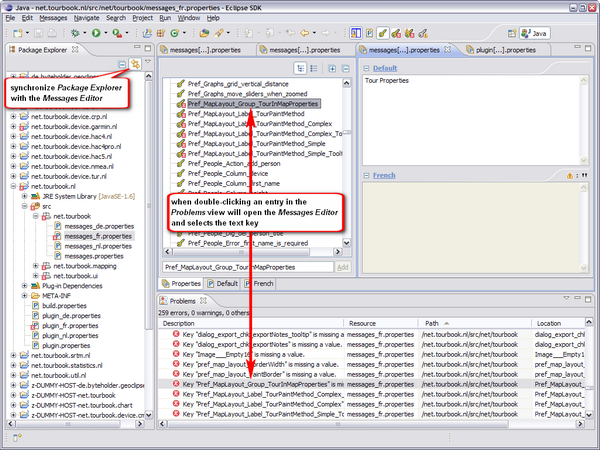
The Problems view displays all text keys which have not yet been translated.
This page is updated for version 16.4


