Translation: Step 5 - Test Translation
The translated text can be tested in the application with the following steps.
This procedure is different compared with the procedure before version 18.11
Export Translated Text
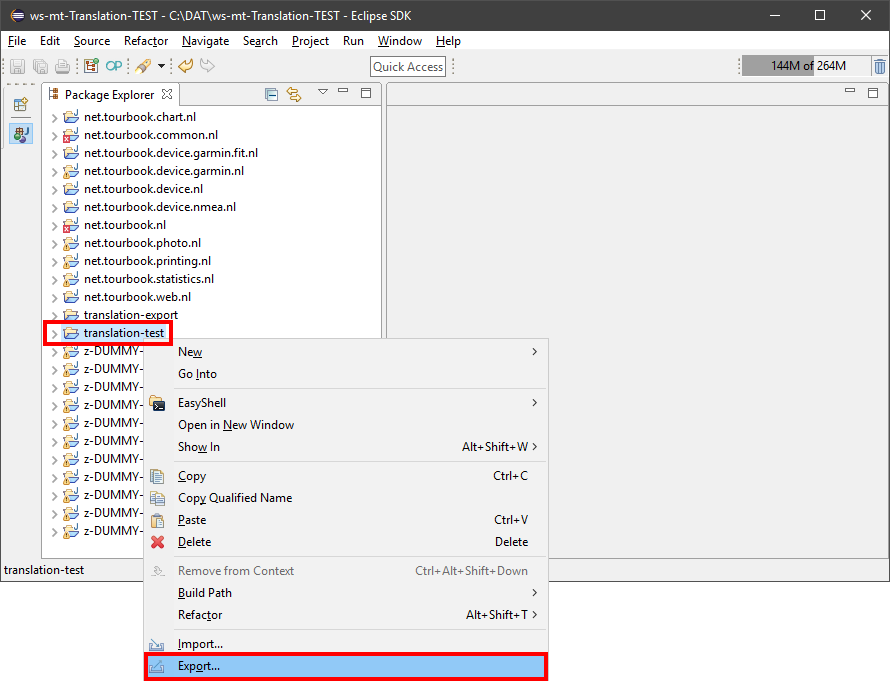
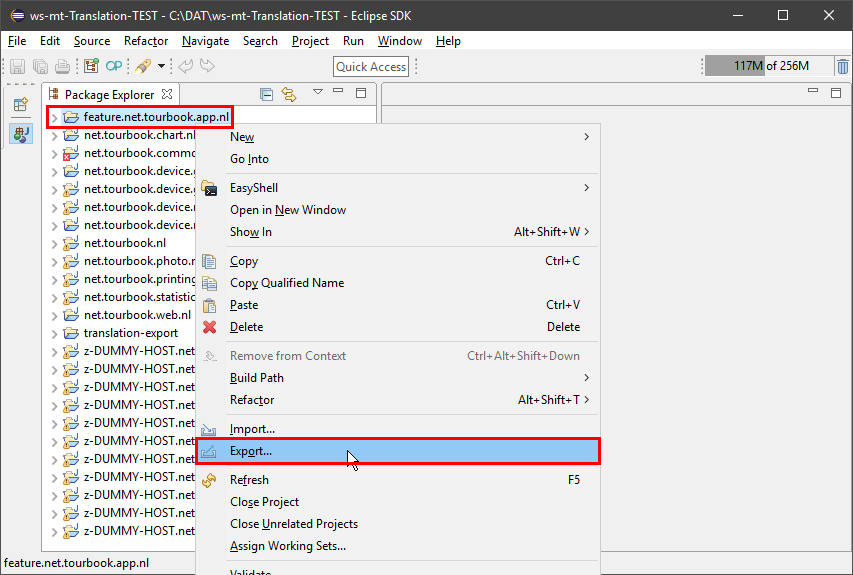
- Select project translation-test OR project feature.net.tourbook.app.nl
Which project is available depends on the used Eclipse version.
The folder name of this project is translation-test, the Eclipse internal project name is feature.net.tourbook.app.nl - Select Export... in the context menu
OR
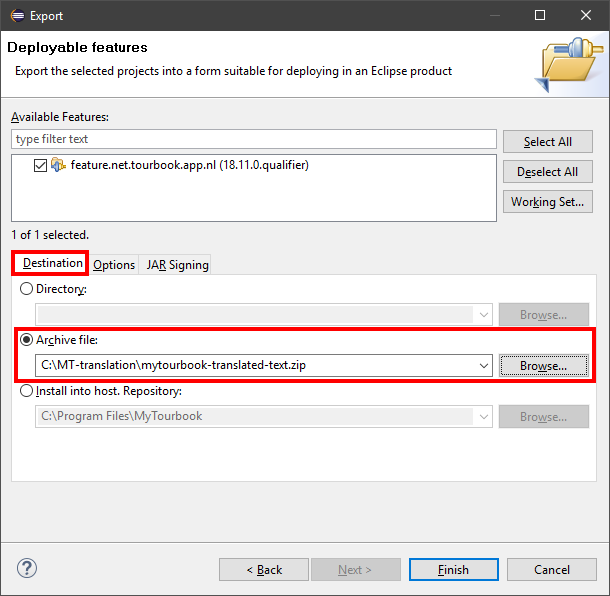
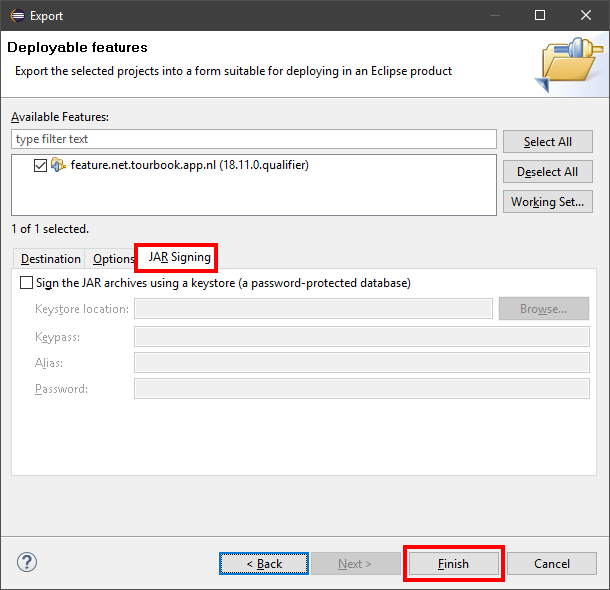
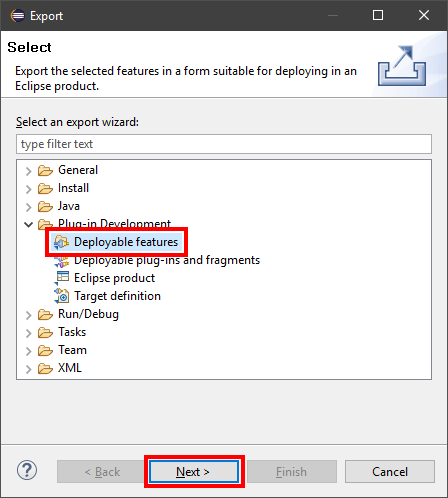
- Select Deployable features
- Press Next
- Select Archive file in Destination tab
- Enter file/path name for the archive file,
e.g. C:\MT-translation\mytourbook-translated-text.zip
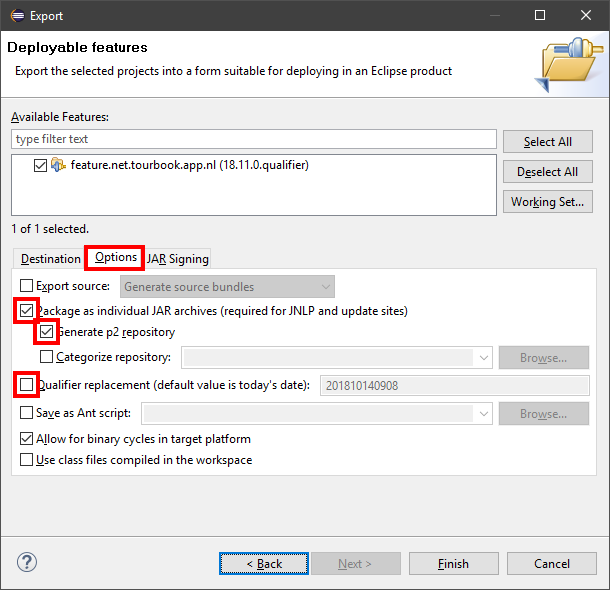
- Select tab Options
- Make sure that the options are checked correctly
- Tab JAR Signing is not used
- Press Finish
When the translated text is tested several times then the same archive can be reused and can be overwritten.

Setup Location for the Translation
- Open MyTourbook application
This must be done only once, skip the following steps when the translation install location is already setup, proceed to Install Translated Texts
-
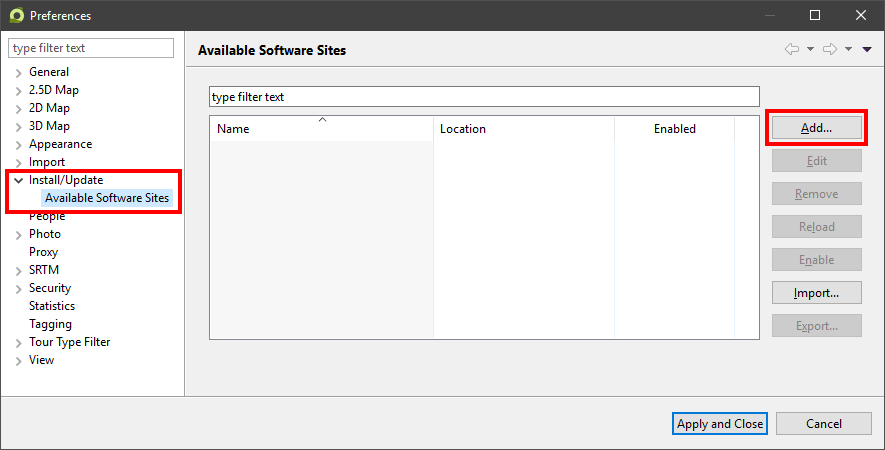
Open preferences
-
Select Install/Update / Available Software Sites
- Press Add..
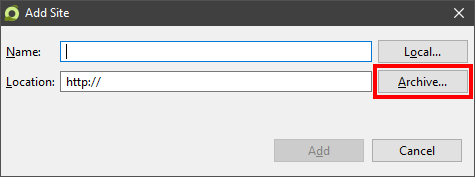
- Press Archive
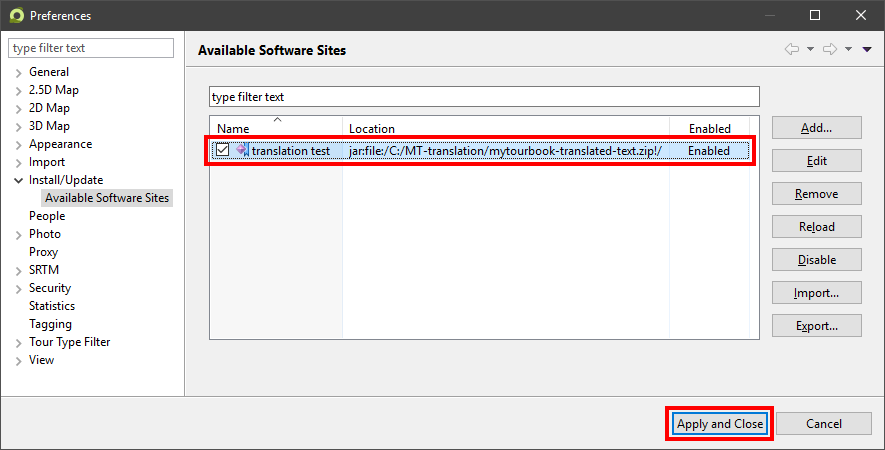
- Select the archive file which was created in the steps above,
e.g. C:\MT-translation\mytourbook-translated-text.zip
Do not enter a name in the Location: field because the name is set to an internal name after the archive is selected.
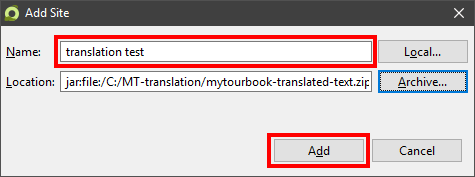
- Enter a descriptive name in the field Name
- Press Add
Install Translated Text
The translated text must be installed the same way as a software update, in this case only the text is installed and not the program code.
It is possible that administrator acces is required.
-
Select Check for Updates in the Help menu
This action will search all update sites which are enabled in the Software Sites. Because the software site for the translates text was just created (it has a newer timestamp), only this should be displayed.
However when other features/packages are checked, they should be unchecked.
When anything goes wrong you can still reinstall the software, this would not change or delete your tour data.
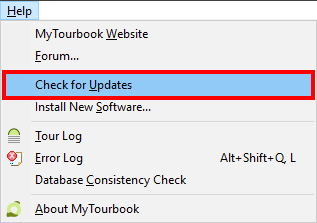
Depending on your previous actions to configure the update site, it is possible that the action Check for Updates displays this message No updates were found.
A restart of the application can solve this problem, however when this do not solve the problem, there is the advanced feature Install New Software... to install it, this also shows more info when an installation fails.
Additional information for the advanced feature is documented here.
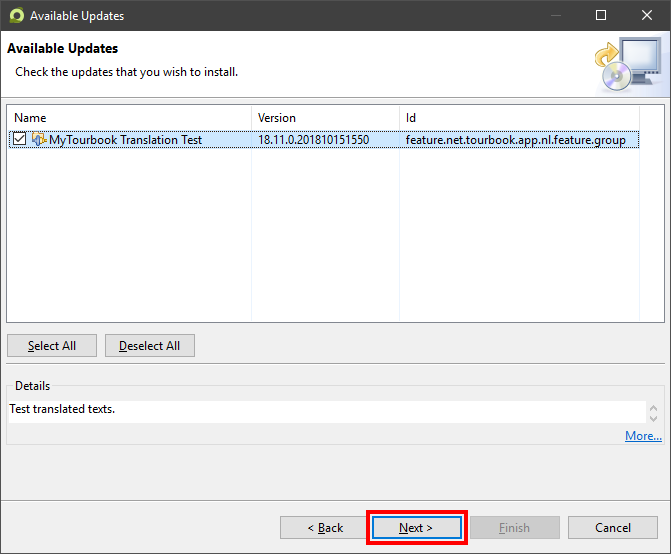
The following dialog is displayed when the update tool finds a new version.
Proceed with the installation as it is done with a software update.
Check Installed Translation Text
-
After a restart of the app, the translated text can be checked.
-
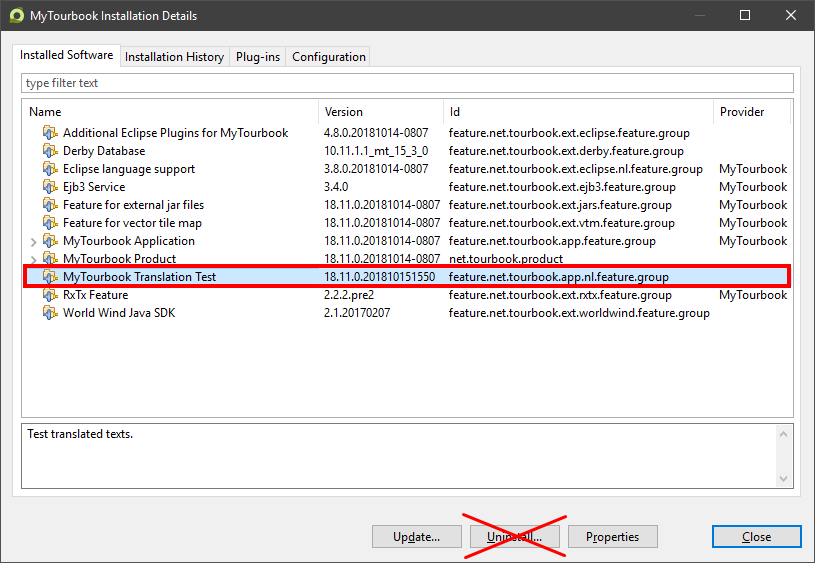
The newly installed text plugin can also be ckecked in the Installation Details dialog, which can be opened from the menu Help / About MyTourbook and the button Installation Details
The Uninstall... button should not be presses, however it should work but is not tested.
This page is updated for version 18.11


